
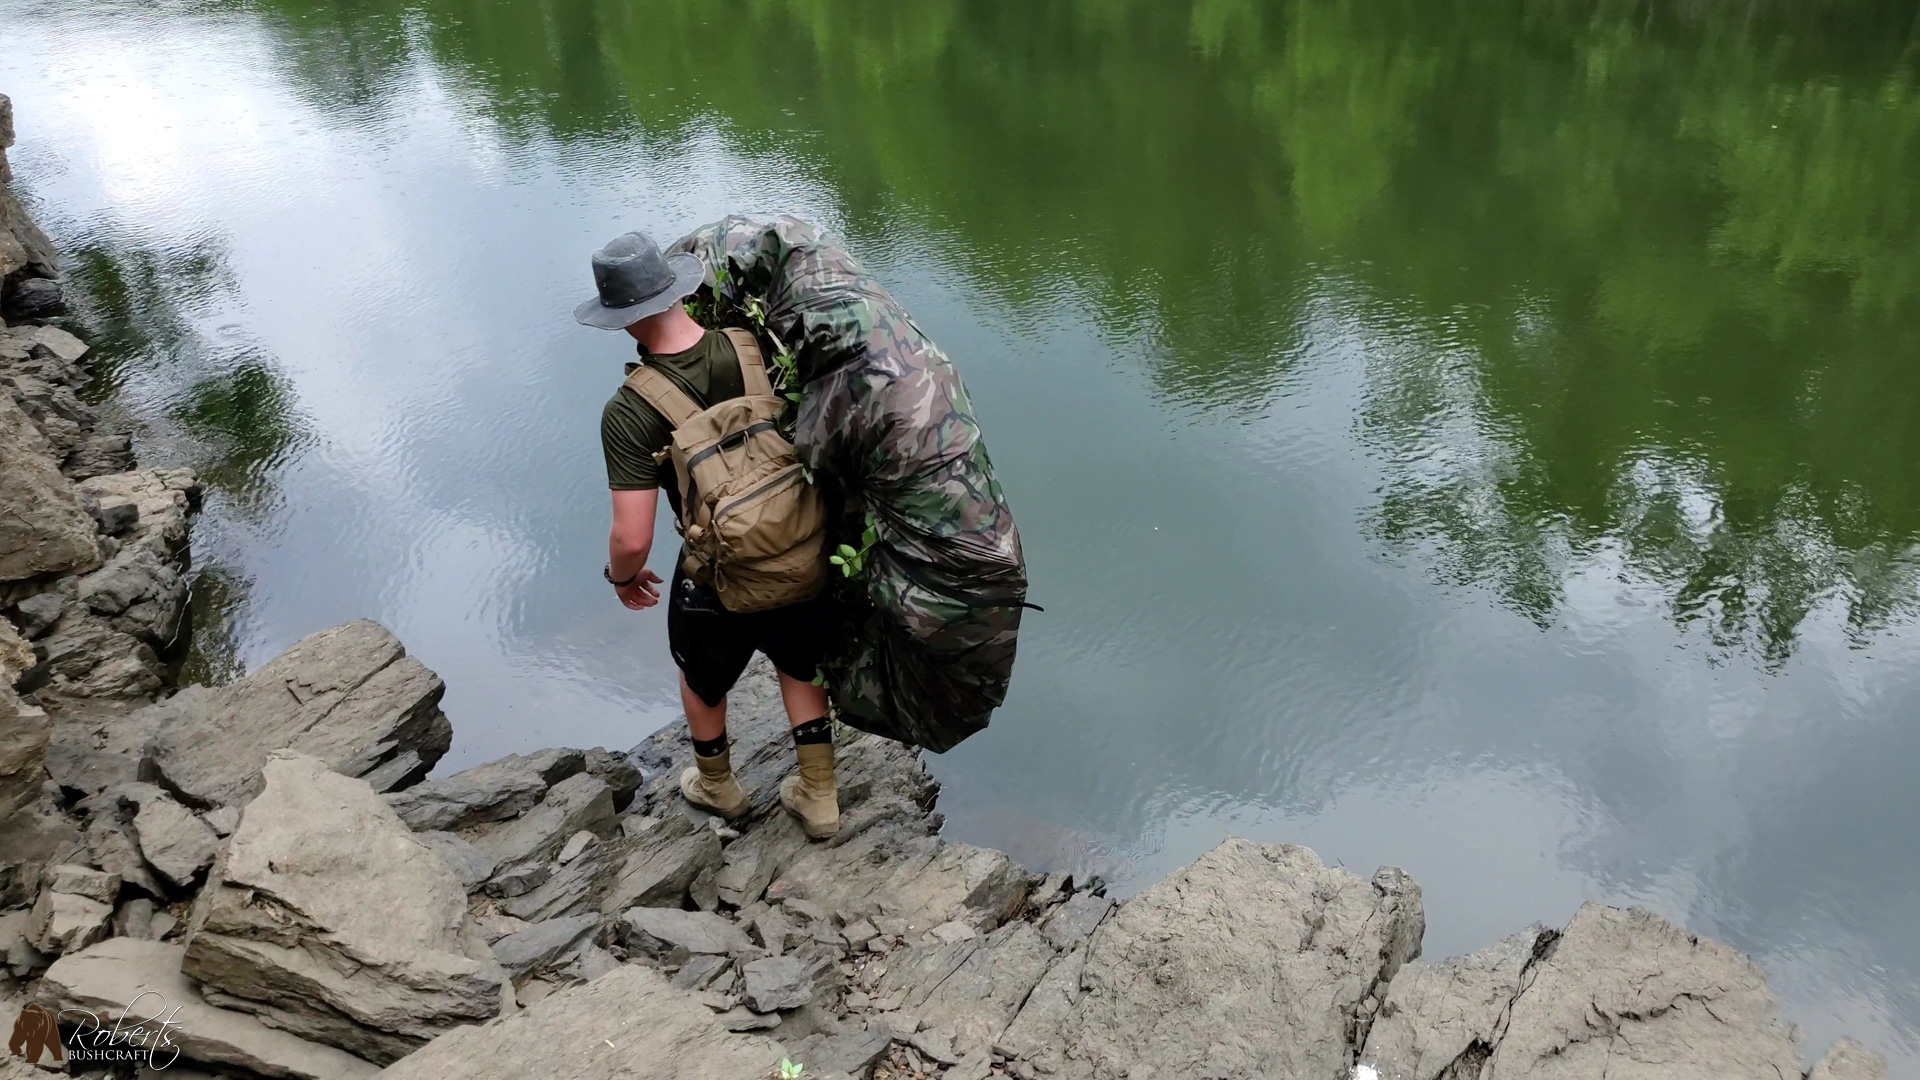
Here's my survival raft that I built to cross the river. Gear is heavy, knowledge weighs nothing, and that means everything. This mission was a challenge and I took it head-on. What's that on the other side of the river?
We'll often find ourselves wanting to cross over to the other side of the river, sometimes we'll swim with our packs and sometimes we'll use our AquaQuest 10x7 Defender tarps as pack floats. There are many different ways to make a raft and for this mission I made a tarp raft with my Aqua Quest tarp, debris, and paracord. The best way to improve your survival skills is to get out and put those skills to the test.
Why not use a kayak or canoe?
A kayak or canoe in this instance would have been a great way to cross the river and get to the other side. That said, we don't always have a kayak or canoe with us, but we do always carry a tarp.

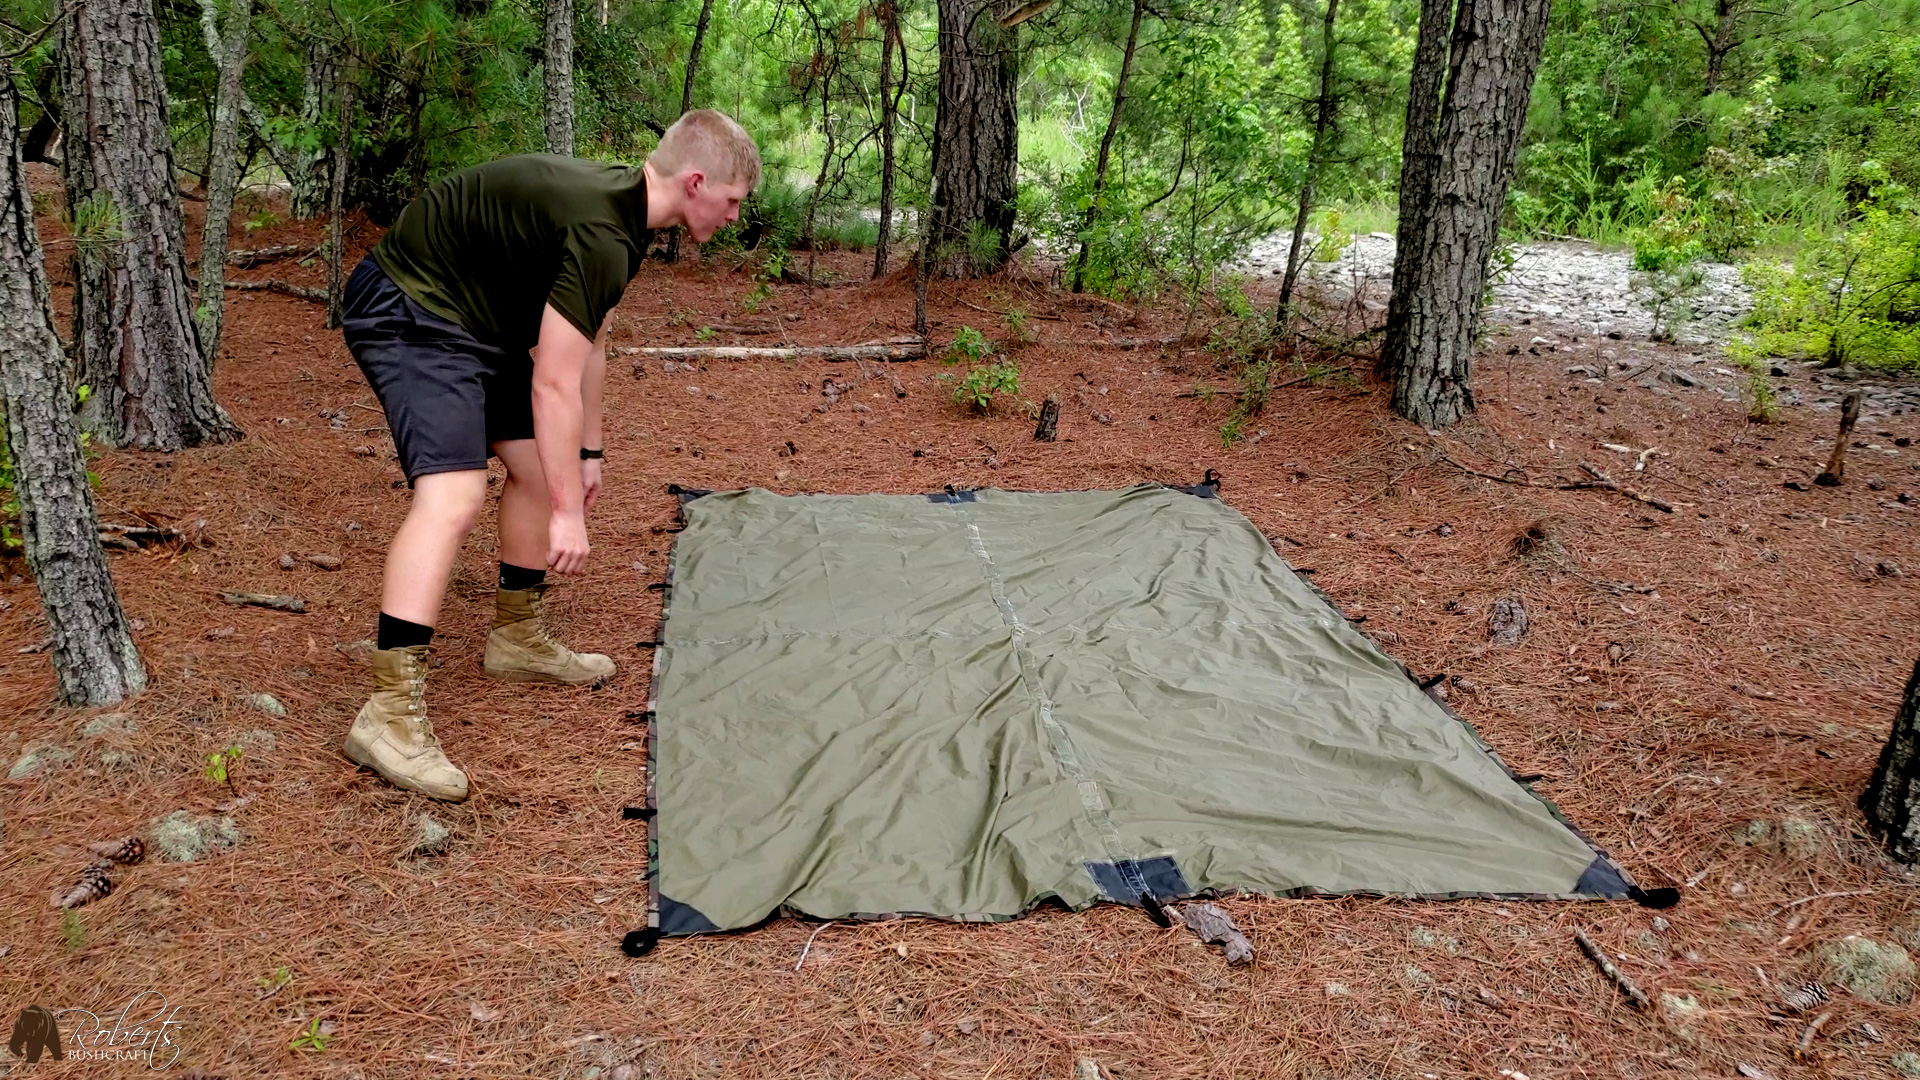
Unpacking the tarp from my backpack is a simple grab and toss operation. The Aqua Quest Defender tarp is 100% waterproof, camouflage, and packs down easily. It's kept me completely dry over the years, even in extreme weather like Hurricane Matthew. The tarp has a hydrostatic resistance of 20,000 mm, constructed of 70D nylon with a heavy TPU coating, reinforced stitching, and heat taped seams. I've always had supreme confidence in its defense against mother nature.
I hauled all of my gear to the mission site in my Eagle Industries USMC FILBE Assault Pack. This pack has been a workhorse for me over the years. I have a review posted here. It's a part of the FILBE (Family of Improved Load Bearing Equipment) issued to the United States Marine Corps. Simply put, it's slim in terms of comfort. It's bombproof, and it's been my choice of hardcore gear for a couple of years now. In terms of gear, it's hard to argue against the heavy-duty construction of military surplus.

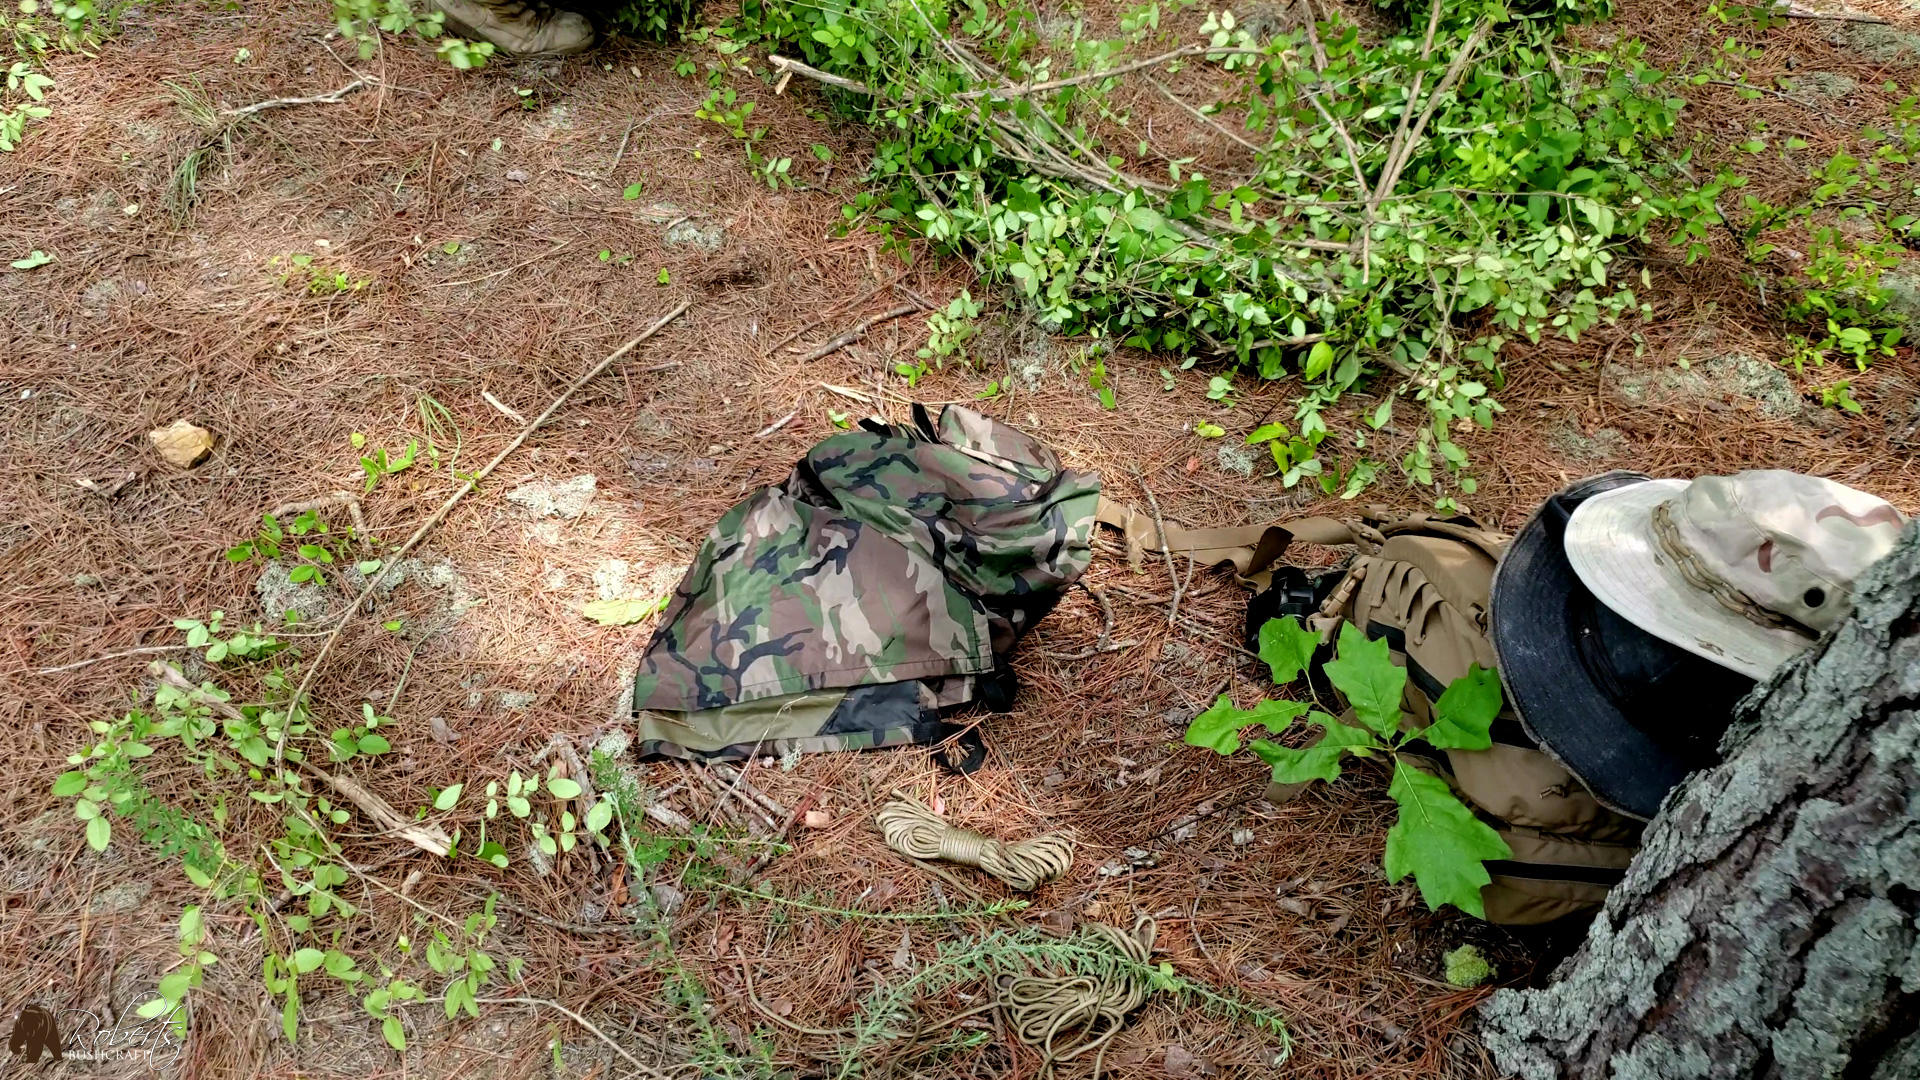
I spent a while cutting Japanese honeysuckle and Tree of Heaven and placing them in piles. Doing this allowed me to see how much debris I had collected and sort the pile by size. For this raft build there were a couple of requirements. One, I had to use one continuous piece of paracord. No cutting, the paracord needed to be recovered and remain usable for future needs. Two, I had to make it across the river and back without sinking or drowning. Pretty important requirements!
Taking Shape
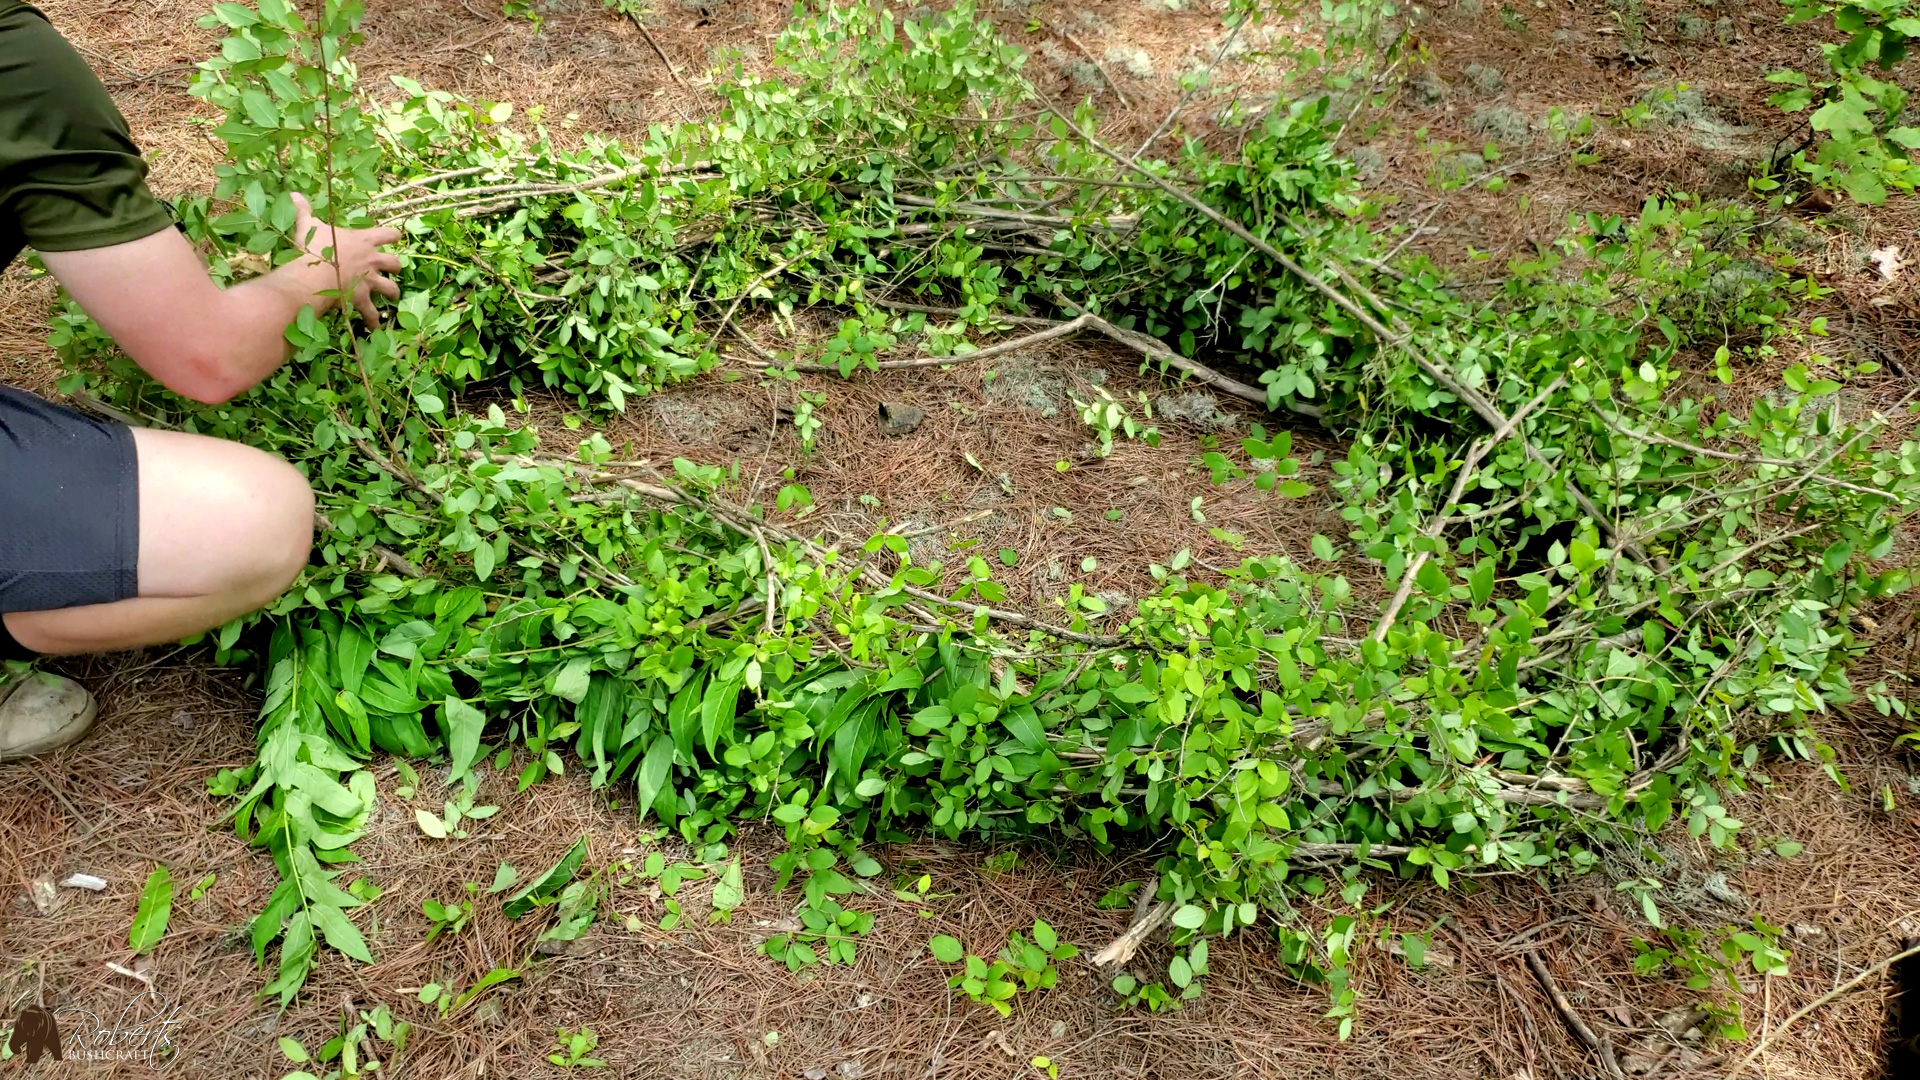
The shape of the raft is oval and constructed in a similar fashion as a bird's nest around the rim. I used Tree of Heaven as the rim and base shape and then weaved in pieces of Japanese honeysuckle to give the raft depth. This is important in that it keeps your gunnels above water!
I cleared the ground of any debris such as rocks, limbs, and pinecones that I could see. These tarps are superb in construction and materials but there is no need to be careless. Often I've seen success easily slip from my grasp because I simply didn't take a little extra time to prep, or recheck what I had already checked, and marveled in wonder thinking that I thought that I had checked.
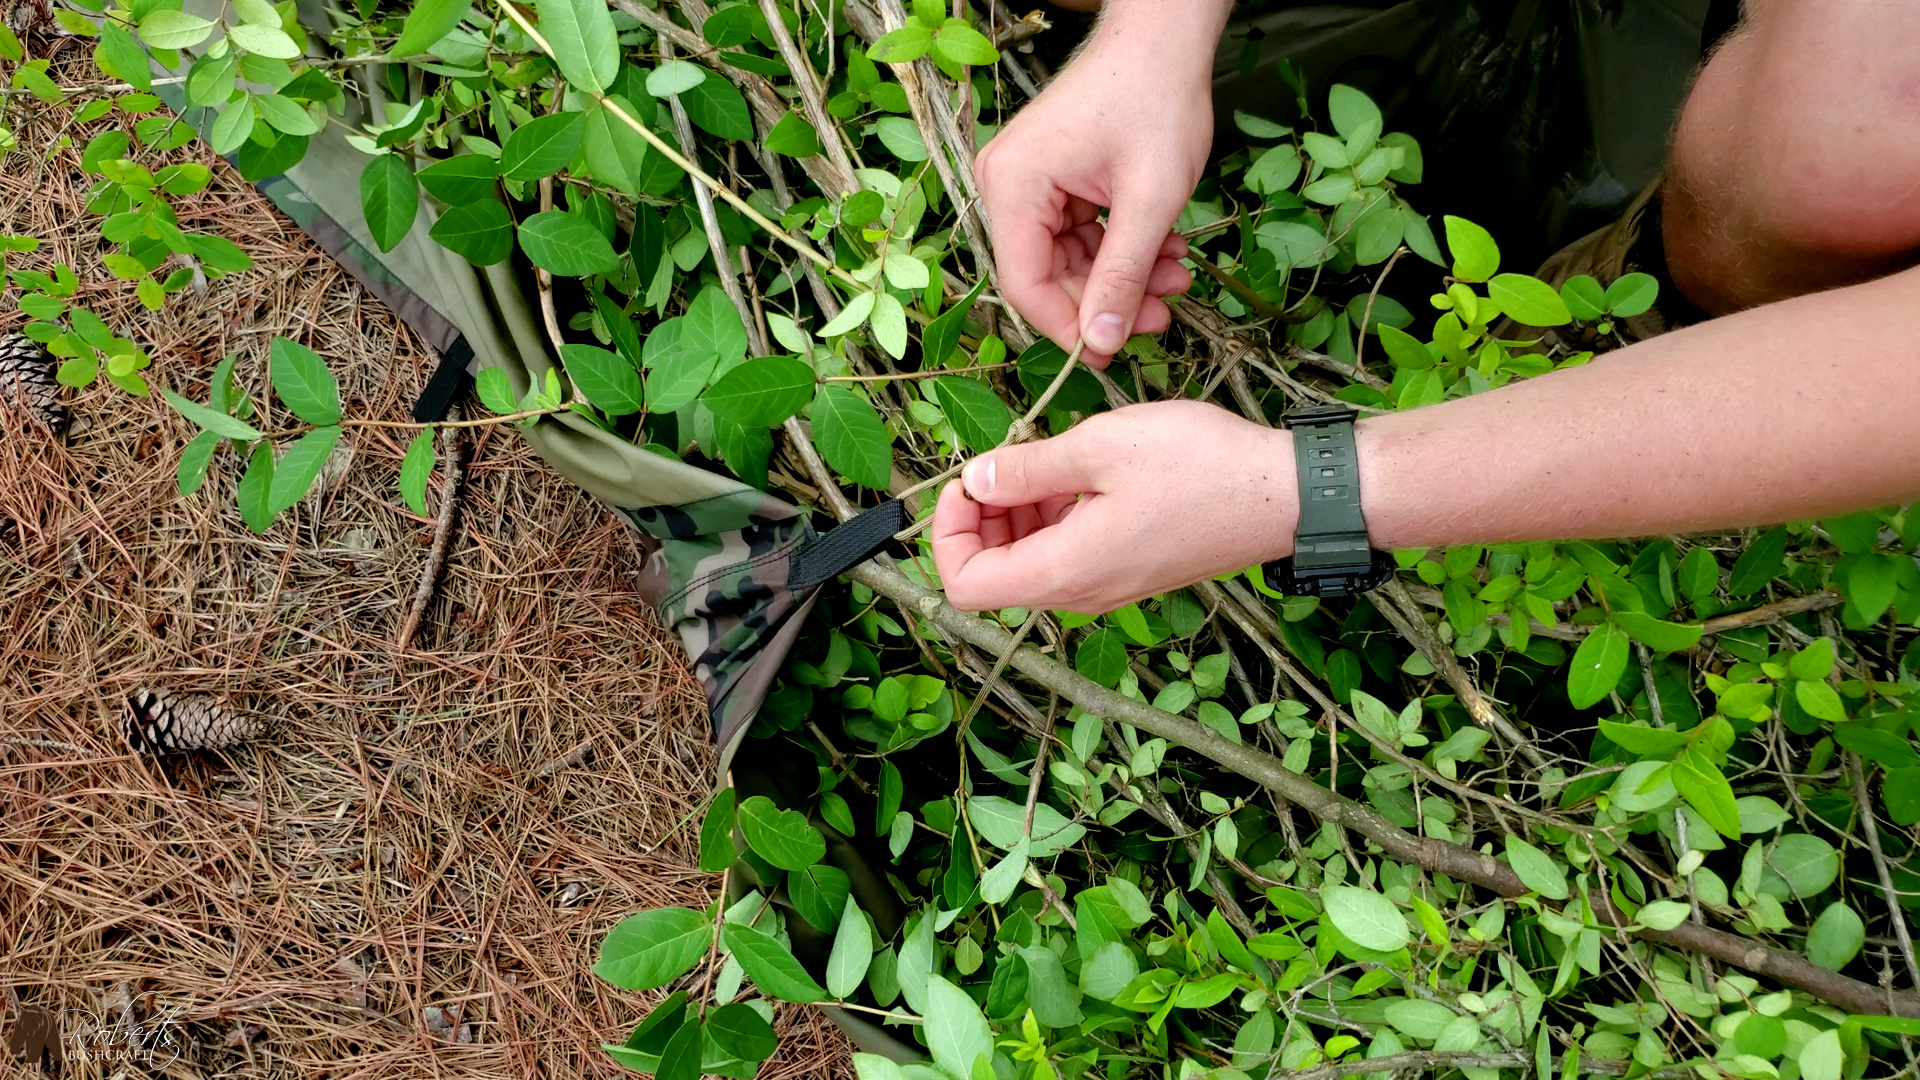
The raft is beginning to take more of a recognizable form now that paracord is being wrapped around the limbs of the debris. This is perhaps the most tedious and time-consuming part of the build, wrapping and tying knots so that the raft will keep its shape once under pressure of body and water. The slow pace does allow me to make sure that my knots are secure and that the limbs are in place as needed to support the tarp once it's wrapped.
Placing the raft frame
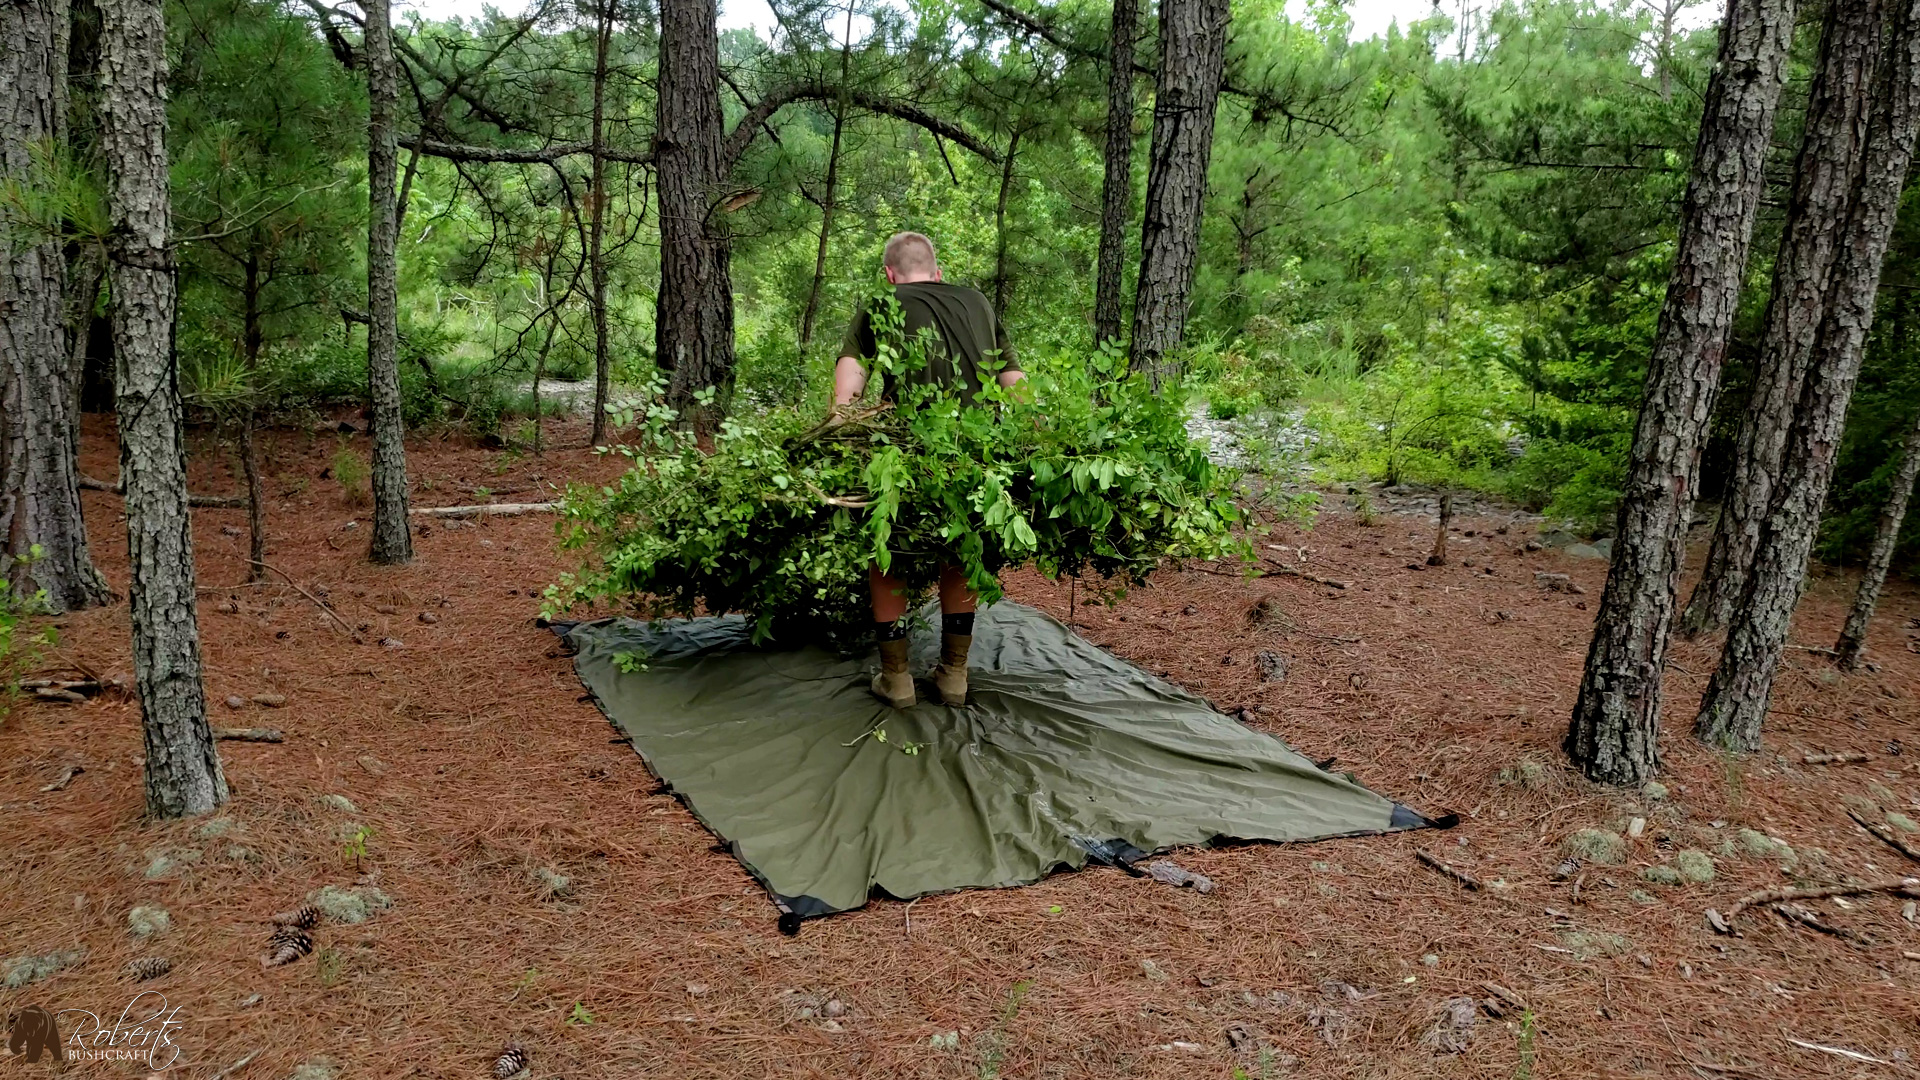
Now that my knots are tied and limbs secured, I move the raft frame over to the Aqua Quest Defender tarp. The placement of the debris onto the tarp is crucial because there needs to be enough of the tarp to cover all sides of the raft. The seam down the middle of the tarp provides an easy-to-see guide and it's a breeze to get the raft frame centered.
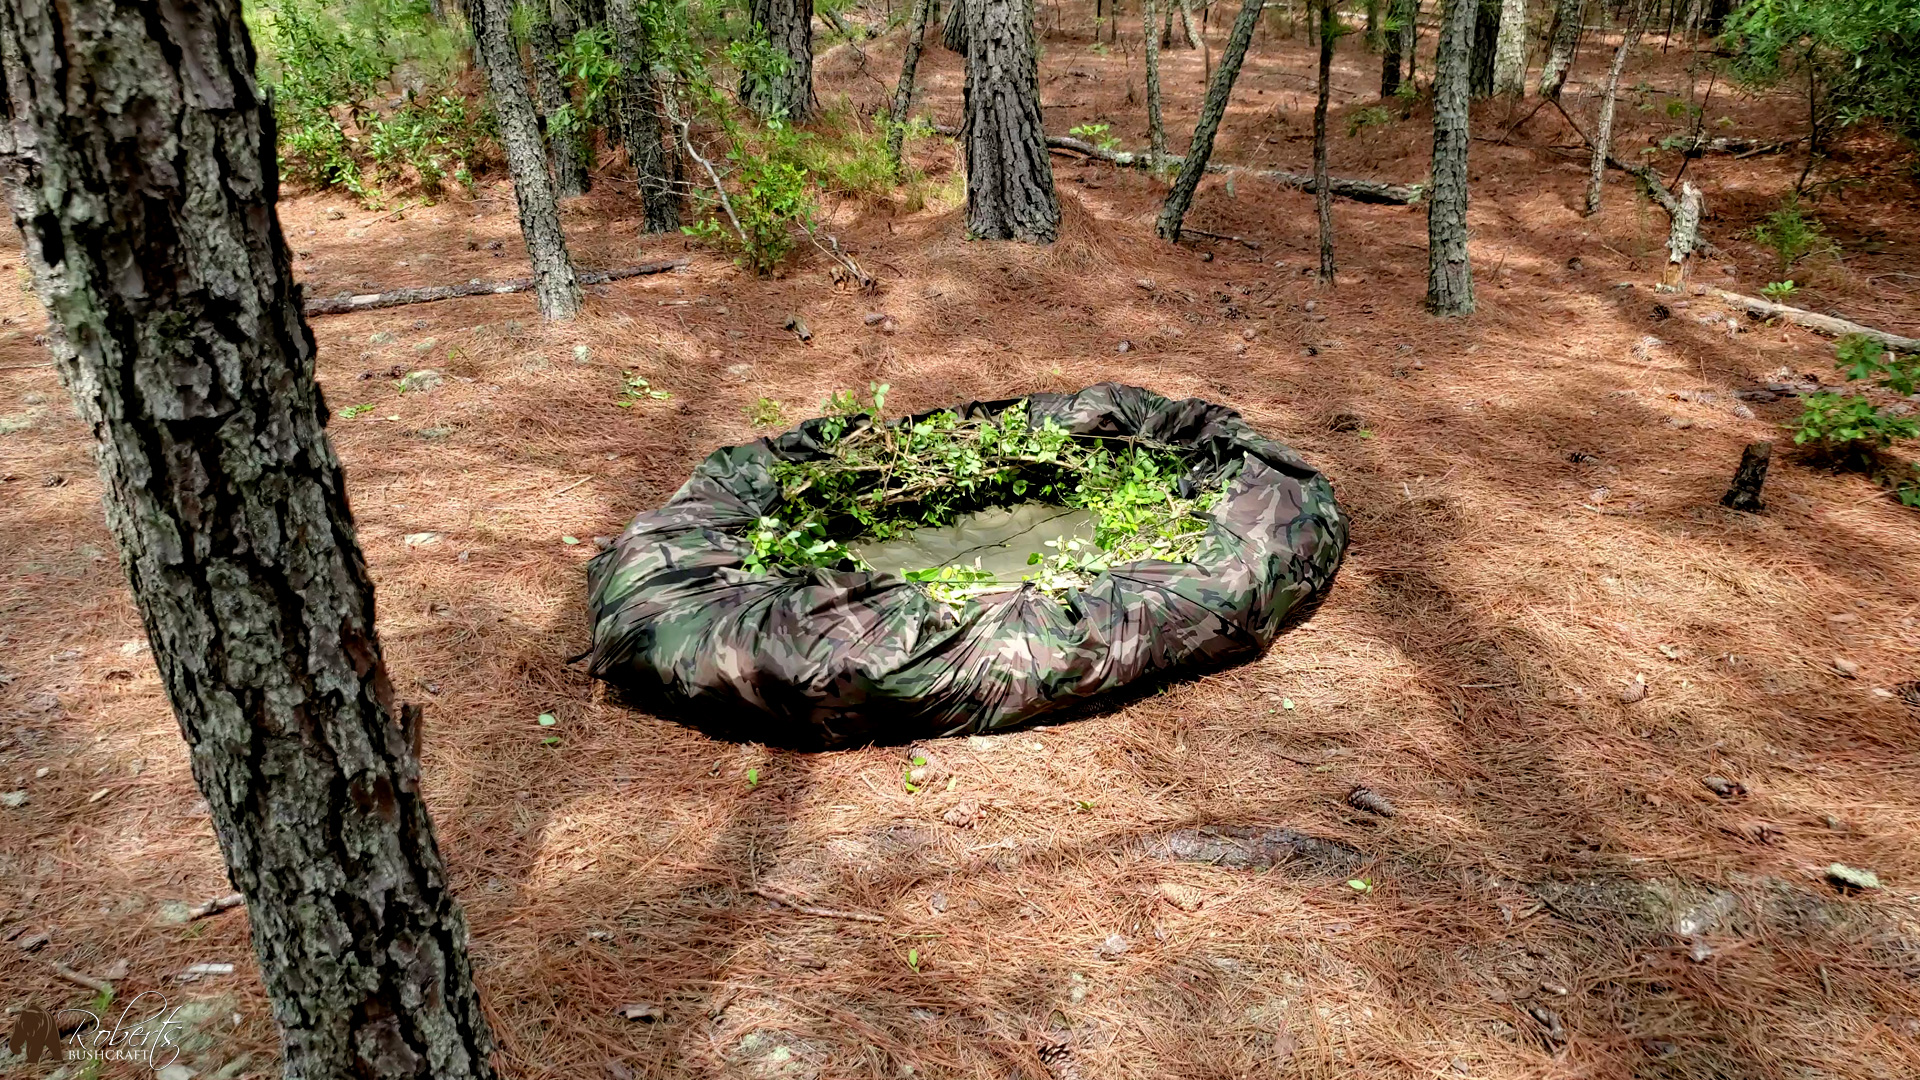
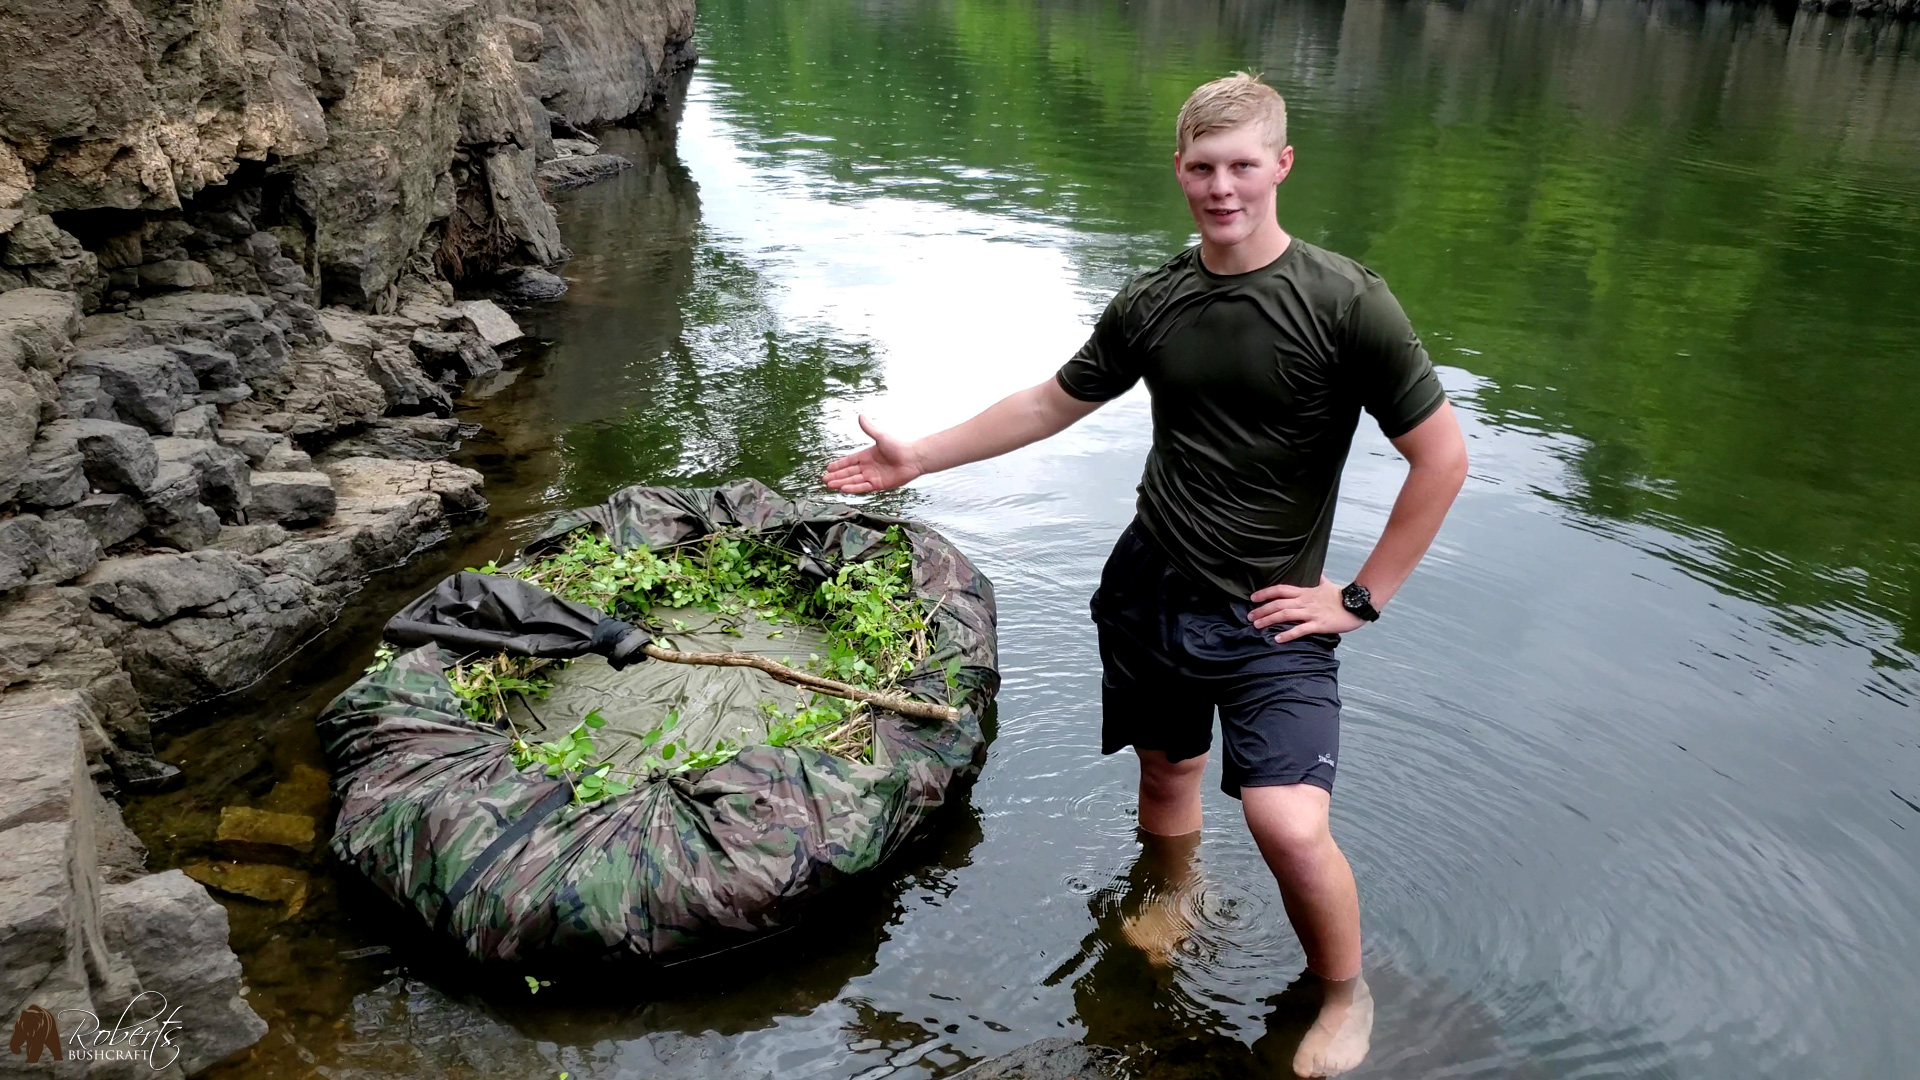
Here she is, green debris wreathed in a tarp! The build took about an hour and some change from debris cut to this point. During the tarp application, I was able to check and tighten paracord and knots where needed. Overall I am very pleased with how this turned out, I kept all of my fingers and didn't get any splinters.
Raft build is now complete and ready for hydro-testing. Missions like these are confidence builders at their core and I do my best to glean as much information from the experience as possible. One example is that I couldn't cut paracord, and that was something that I really wanted to do. Cut it! Most of the time I will cut paracord and use it for its intended purpose at the moment and later realize that I could have completed the same task without cutting and keeping it one length.
Why can't I cut paracord?
There's nothing wrong with cutting your cordage. But if you are like me, you cut the paracord only to end up with random lengths of cordage that soon begin to find their way out of kit because they're too short to be useful except in small projects.
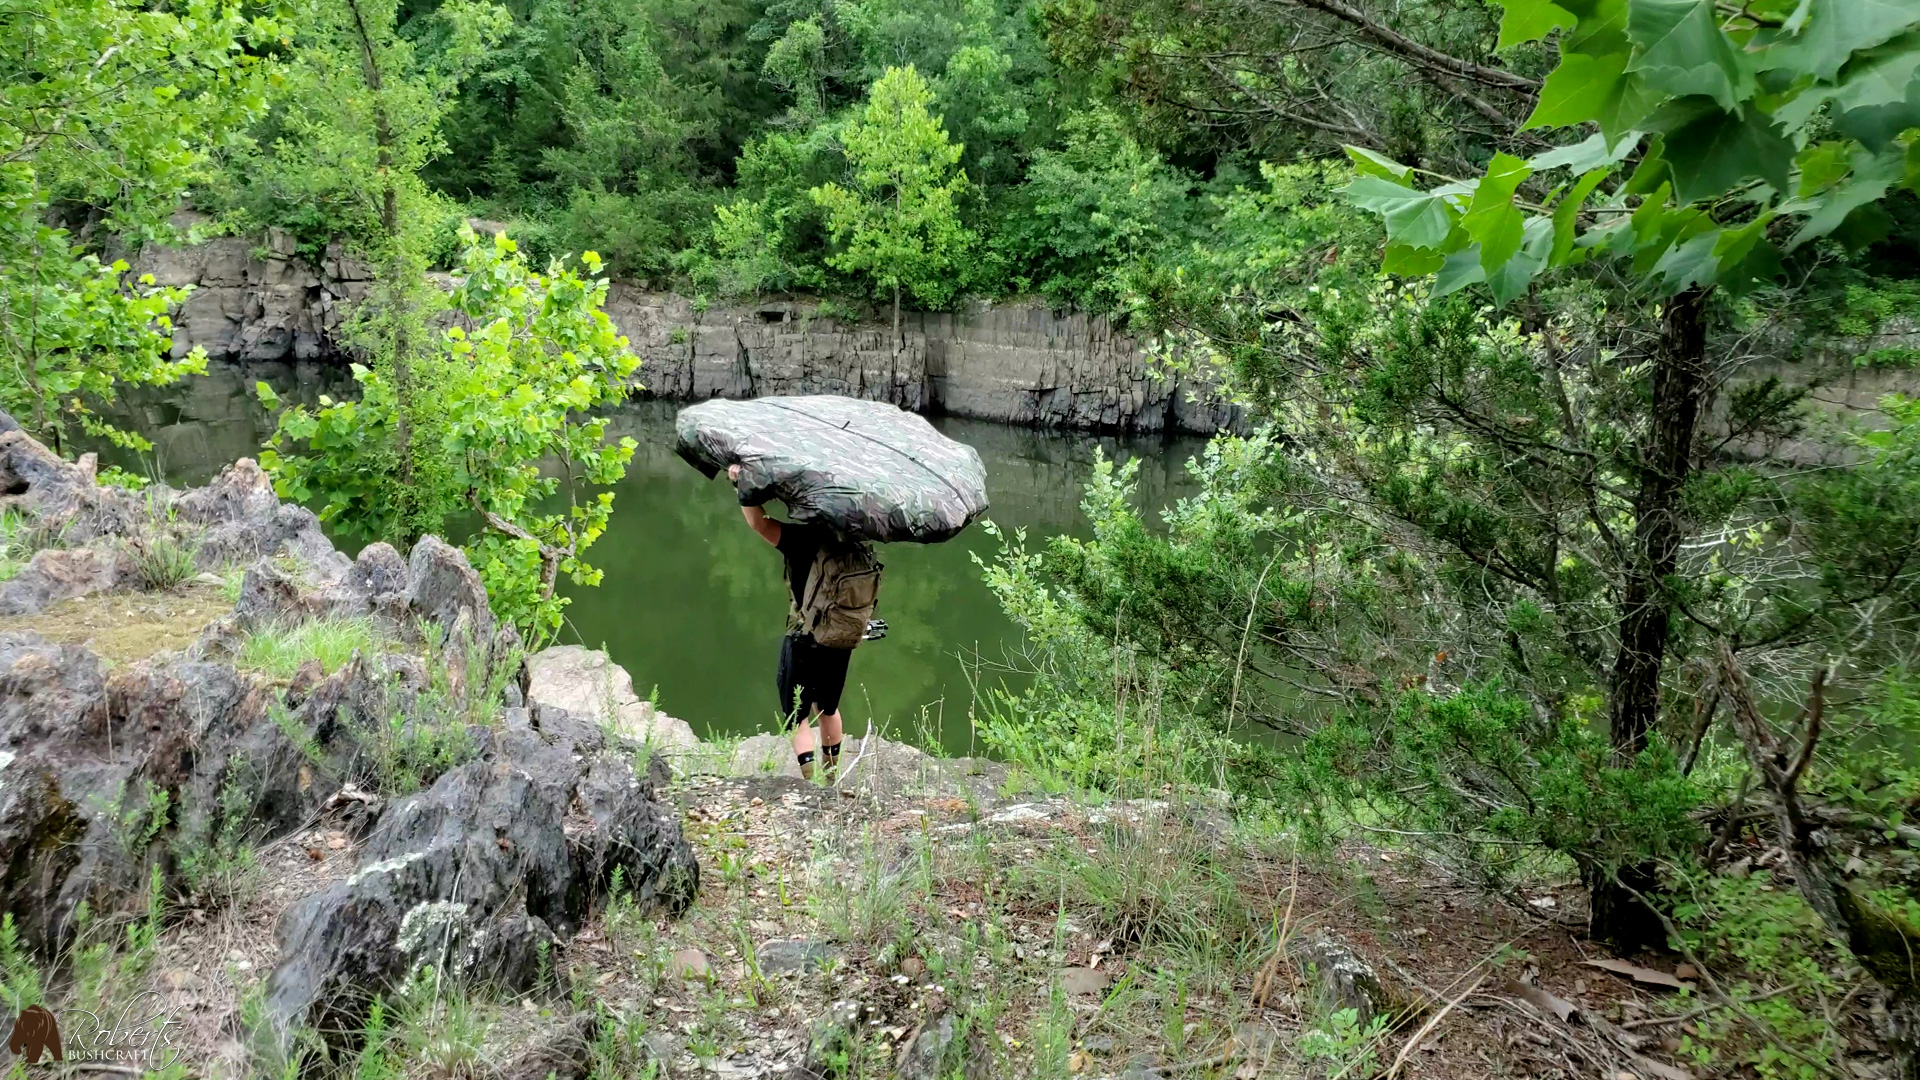
I built the raft away from the river's edge for a couple of different reasons. First, OPSEC. This part of the river is popular with fishermen. They'll zoom right on by most of the time without so much as even a glance in my direction. Sometimes they'll float along with the current. Most of the time I like to remain in the shadows, keeping quiet and limiting movement.
What about sound?
Quite often we're alerted to the presence of drifting boaters because their cigarette smoke carries on the wind, their music is loud, or by simple conversation. I decided to build the raft away from the river's edge so that I could maintain OPSEC until I was ready to move down to the water. The second reason is that resources were more abundant on the ridge, and removing them from there wouldn't give a passing boater a reason to look at a new gaping hole of exposed rock that was once covered in honeysuckle.
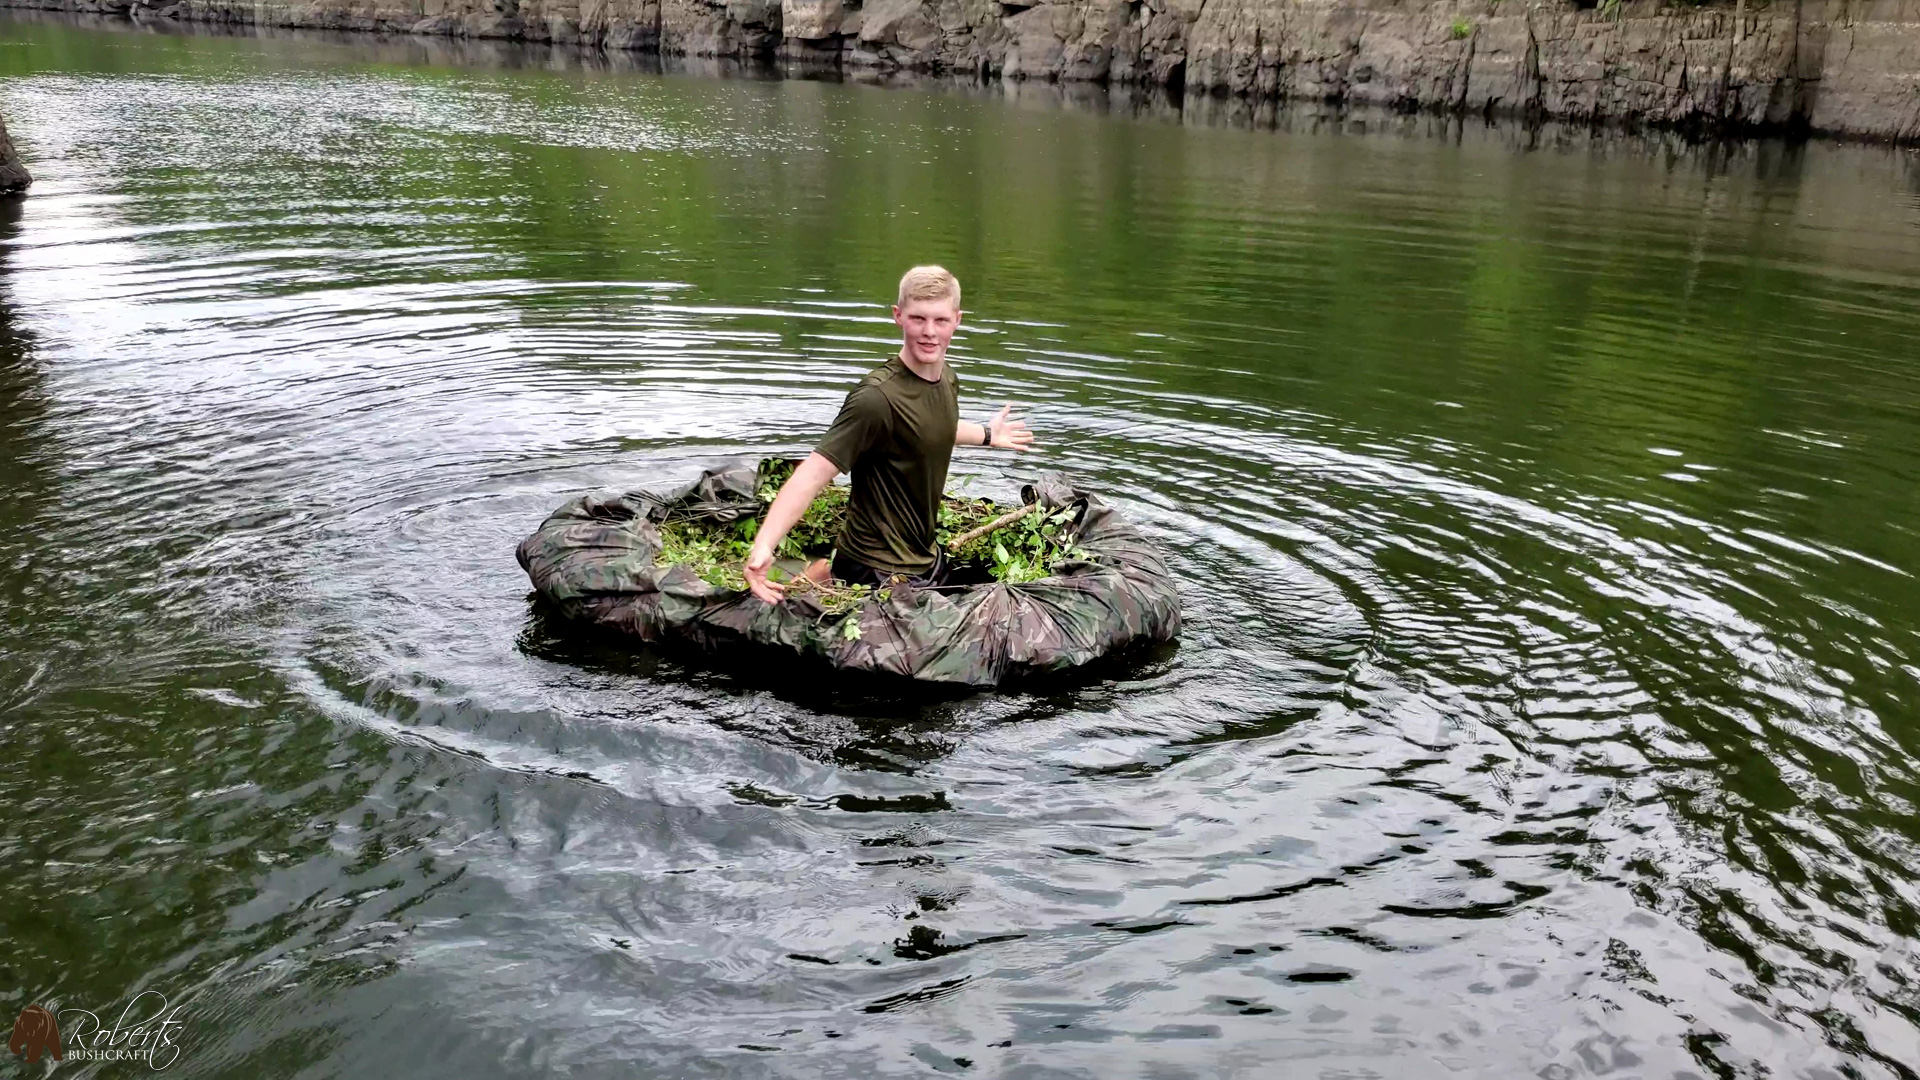
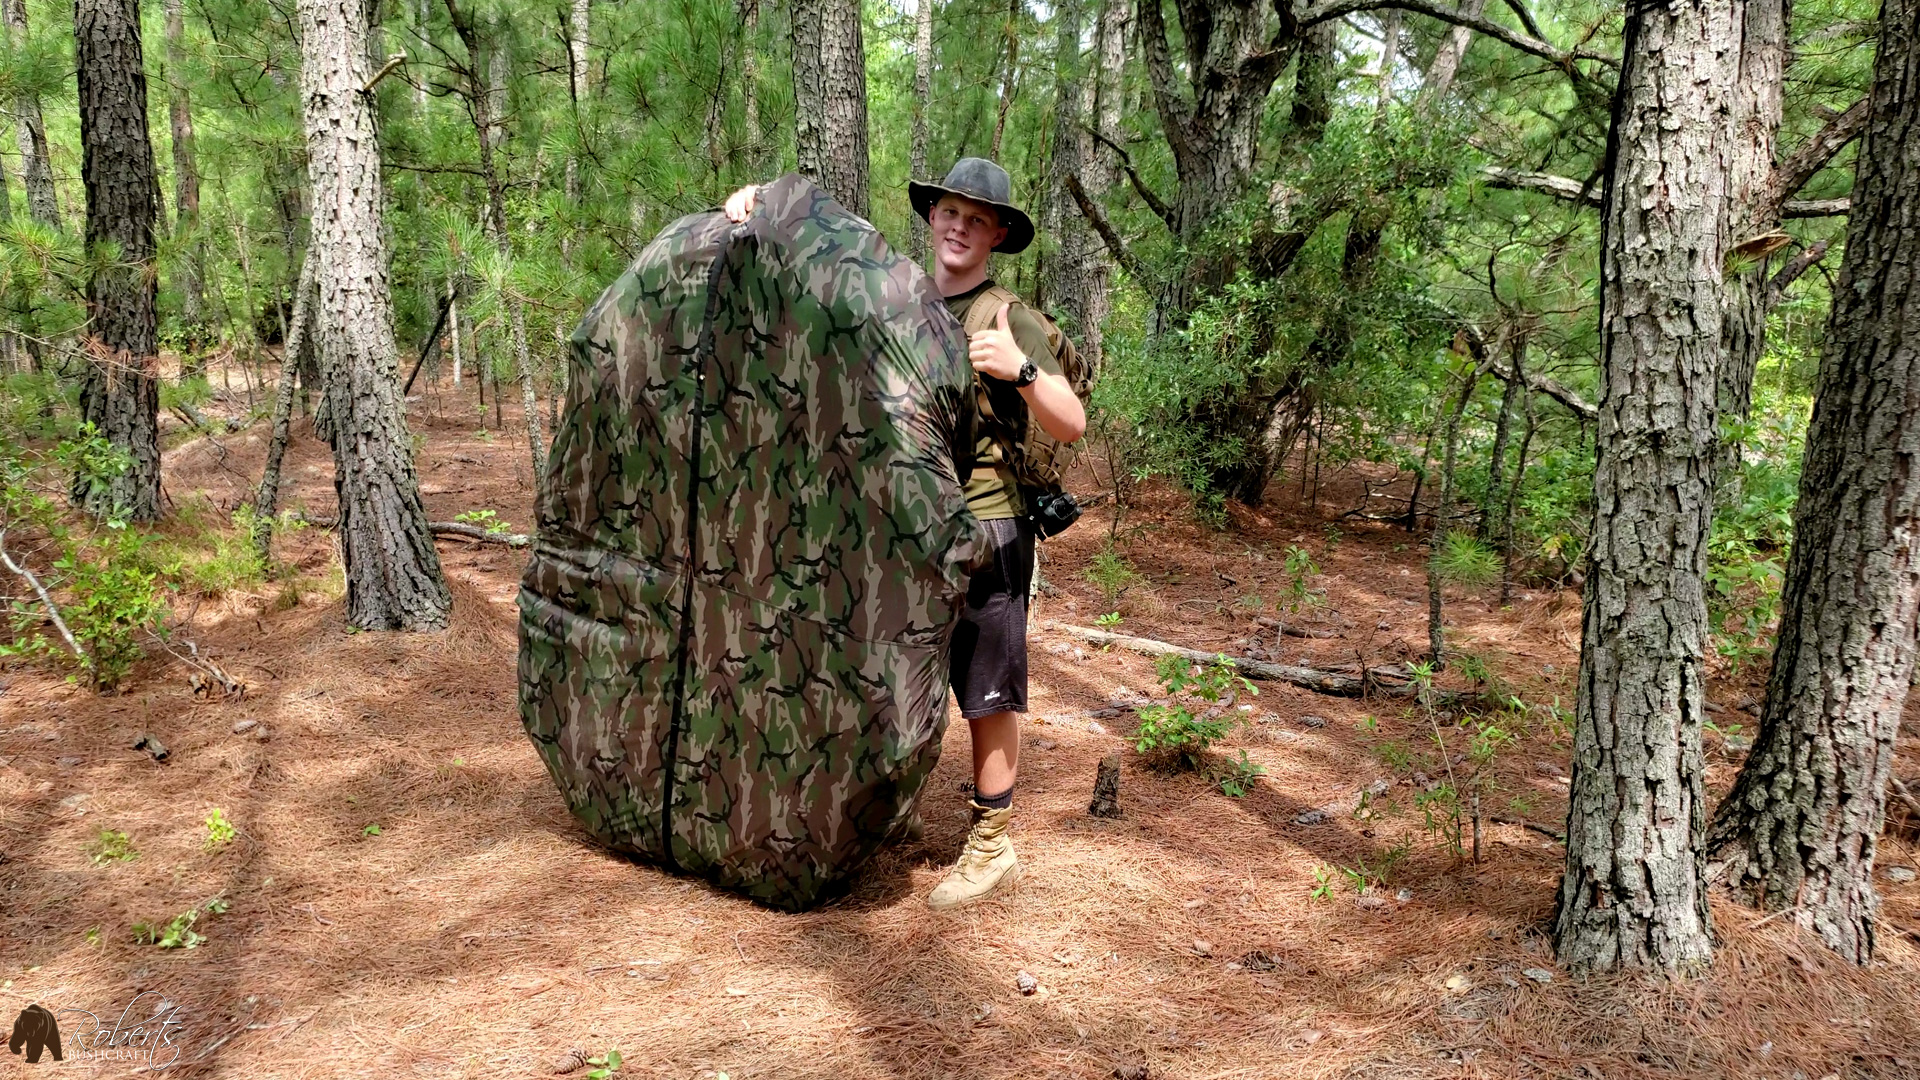
A successful mission. I set out to build a raft that could hold my weight, and that of my gear, and provide me a way to cross the river without getting wet. The raft held together perfectly under the stress of my weight.
The weakest part of the build
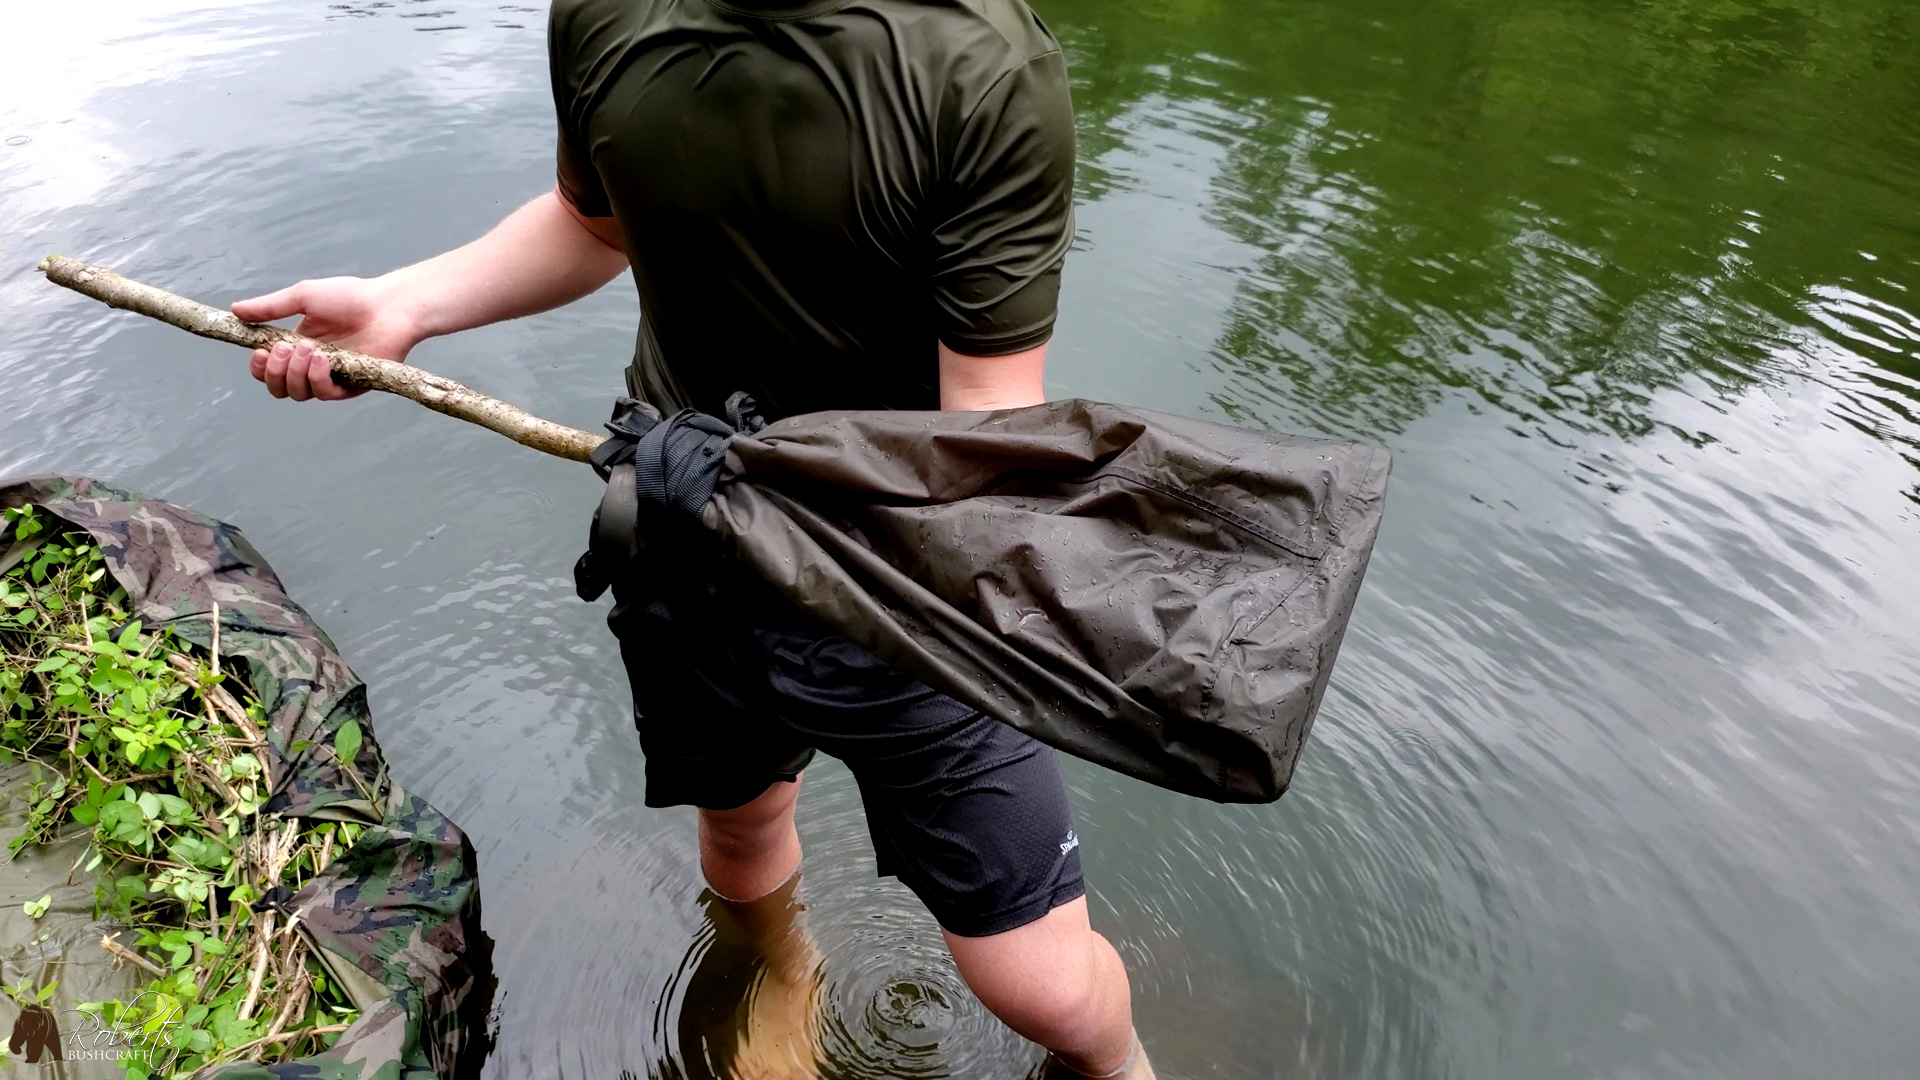
The weakest part of this survival raft build was my paddle. I spent, by far, the least amount of thought and time in its construction. Deployment revealed to me that I should have spent a better portion of my efforts in this area. I look at this now like a gun with poor ammo. That's a big glean there.
Mission: Success
Mission success. I appreciate the challenge of missions like this. I'm required to think, process, build, and deploy. I've never wanted to be someone that wondered what lies on the other side of the river. I've always wanted to go and find out.
